Image Credit – Kelsey
Vegan leather has become a popular alternative to traditional leather thanks to its cruelty-free appeal, modern look, and affordability. However, just like genuine leather, it can crack, peel, or scuff over time. Knowing how to repair your vegan leather can help extend its lifespan, restore its appearance, and save you money. Whether it’s a handbag, jacket, sofa, or pair of shoes, small damages don’t always mean replacement. With the right tools and techniques, vegan leather can often be repaired at home.
How to Repair Your Vegan Leather: A Complete Care Guide
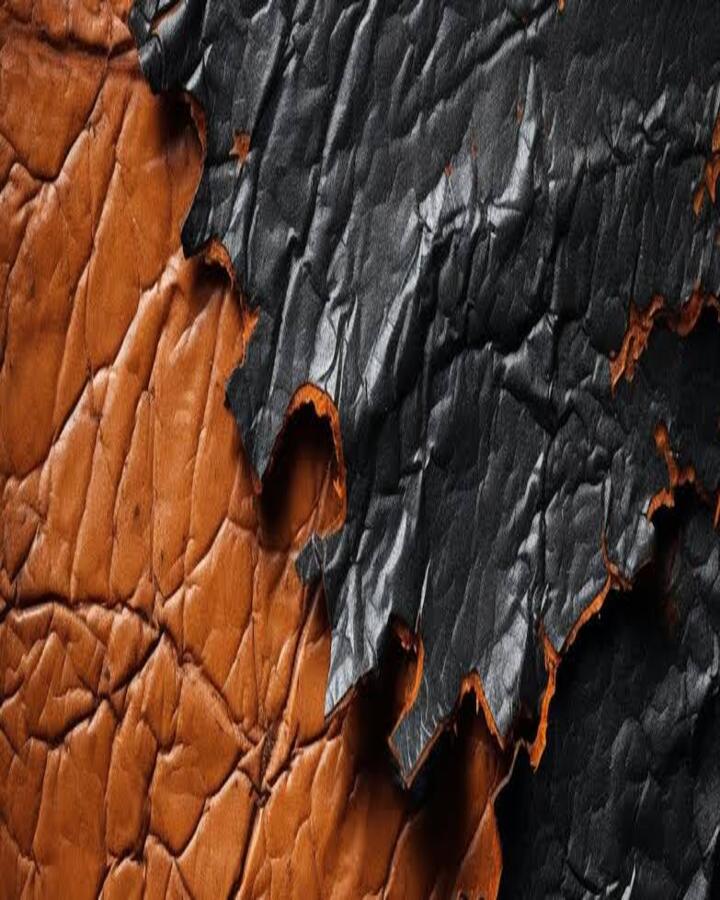
Understanding Vegan Leather Damage
Before learning how to repair your vegan leather, it’s important to understand why damage happens. Vegan leather is typically made from polyurethane (PU), PVC, or plant-based materials. Over time, exposure to heat, sunlight, friction, and moisture can cause:
- Surface cracking
- Peeling or flaking
- Small tears
- Scratches and scuffs
- Fading or stiffness
Catching these issues early makes repairs much easier and more effective.
Tools and Materials You’ll Need
To repair vegan leather successfully, gather the following items:
- Mild soap and soft cloth
- Vegan leather repair compound or flexible filler
- Fine-grit sandpaper (400–600 grit)
- Soft sponge or applicator
- Color-matching acrylic or vegan leather paint
- Clear flexible sealant or finisher
- Hair dryer (optional, for faster drying)
Step-by-Step: How to Repair Your Vegan Leather
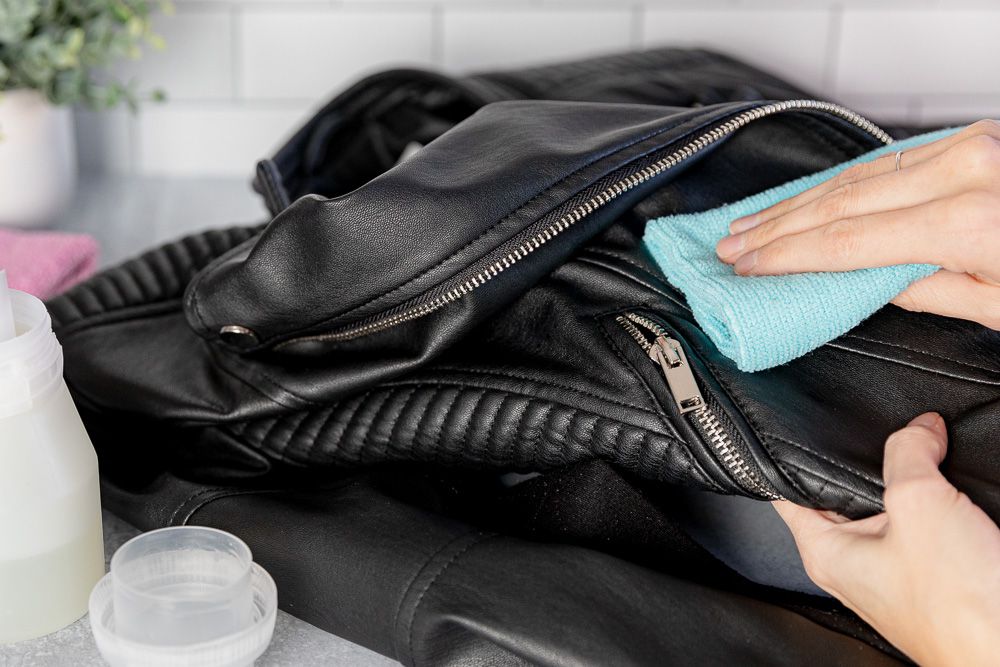
1. Clean the Surface
Start by gently cleaning the damaged area with mild soap and a damp cloth. Remove dirt, oils, or residue so the repair materials can bond properly. Let it dry completely.
2. Lightly Sand the Damaged Area
Use fine-grit sandpaper to smooth cracked or peeling edges. This helps remove loose material and creates an even surface. Be gentle—over-sanding can worsen the damage.
3. Apply Vegan Leather Repair Compound
Using a sponge or spatula, apply a thin layer of repair compound to the damaged area. Smooth it evenly and let it dry. For deeper cracks or peeling, apply multiple thin layers, allowing each layer to dry fully before adding the next.
4. Sand Between Layers
Once dry, lightly sand each layer to keep the surface smooth and natural-looking. This step is crucial when learning how to repair your vegan leather properly.
5. Color Matching and Painting
Choose a paint that closely matches your vegan leather item. Dab the paint gently using a sponge rather than brushing. Build color slowly for a seamless blend.
6. Seal and Protect
Finish by applying a clear, flexible sealant. This protects the repaired area from future cracking and helps maintain flexibility.
Fixing Minor Issues Quickly
- Small scratches: Use a matching color polish or acrylic paint
- Stiff areas: Apply a vegan leather conditioner sparingly
- Light peeling: Trim loose bits and seal with a flexible topcoat
Prevention Tips to Avoid Future Damage
Knowing how to repair your vegan leather is helpful, but prevention is even better:
- Keep items away from direct sunlight and heat
- Clean regularly with a damp cloth
- Avoid harsh chemicals and alcohol-based cleaners
- Store bags and jackets in breathable covers
- Use a vegan leather conditioner occasionally
When Repair Isn’t Enough
If the damage is widespread or structural—such as large tears or severe peeling—professional repair or replacement may be the better option. Vegan leather has limits, and understanding them helps set realistic expectations
Learning how to repair your vegan leather can breathe new life into your favorite cruelty-free pieces. With patience, proper materials, and regular care, you can restore appearance, improve durability, and reduce waste. Small repairs today can prevent bigger problems tomorrow. Let us know in the comment if you’ve tried repairing vegan leather before or have tips to share!
3 Quora Frequently Asked Questions
1.
2. How to repair your vegan leather without professional help?Most minor damage can be fixed at home using basic tools like repair filler, acrylic paint, and a sealant.
3. How to repair your vegan leather and prevent future cracks?
After repairing, keep vegan leather moisturized with proper conditioners and avoid heat, sunlight, and harsh cleaners.
If you want this rewritten for Amazon product blogs, home décor niches, or fashion care websites, I can tailor it instantly 👌


")
